Which pouch format actually fits your product — and what happens if you guess wrong? The wrong answer usually shows up six weeks later as seal failures on the filling line, or as a product that oxidizes two months before its printed expiry date. A beverage brand that moved from 16 oz rigid jars to spouted pouches cut its shipping cube by roughly two-thirds on the same pallet footprint; a supplement brand that specified an under-barriered laminate for a hygroscopic powder ended up reprinting 80,000 units.
Both outcomes came from the same decision chain. This guide walks through that chain in order — structure, film, closure, print, compliance, quantity — so you can match a pouch to your product, your fill line, and your volume commitment, and then write a specification sheet a converter can quote from without ten rounds of clarifying emails.
Key Takeaways
- Five structural families dominate: doypack (round bottom gusset), K-seal, flat-bottom, side-gusseted, spouted, plus retort as a process-defined category. Shape drives shelf presence and capacity; it does not drive shelf life.
- The laminate is the engineering decision. Oxygen and moisture barrier — not pouch silhouette — determines whether your product survives to its stated expiry date.
- Closure selection is a fill-line decision first. Zipper type, spout diameter, and fitment insertion method affect machine speed and seal integrity more than they affect consumer experience.
- Print method follows run length: digital for short runs and SKU proliferation, flexography for mid-volume, rotogravure once annual volumes justify cylinder tooling amortization.
- Recyclable mono-material films are production-ready for many dry goods but still constrained for very high oxygen barrier and thermal processing applications.

What a Stand-Up Pouch Actually Is (And Why the Format Took Shelf Space)
A stand-up pouch is a flexible package built from laminated film webs, sealed along the sides with a folded or welded bottom structure that expands when filled, allowing the package to stand unsupported on a shelf. The format is also called a doypack, after the original French patent family that established the folded-gusset base.
That definition covers a wide range of engineering. A 50 ml sample sachet and a 5 kg pet food bag share the same basic principle and almost nothing else in their construction.
The Anatomy of a Stand-Up Pouch
Every technical drawing you receive from a converter labels the same components. Knowing them makes your specification conversations dramatically shorter.
- Front and back panels — the primary printable faces, dimensioned as width × height (excluding gusset).
- Bottom gusset — the folded or welded base, typically 30–120 mm deep depending on capacity.
- Side seals — usually 5–10 mm wide. Narrow seals save film; wider seals survive drop tests.
- Seal zone — the top area reserved for closing after fill. Never place critical artwork here.
- Tear notch — a die-cut or laser-scored opening initiator, positioned above the zipper.
- Hang hole or euro slot — for peg display; requires reinforced film in the punch area.
- Headspace — the unfilled volume above the product, typically 15–25% of pouch capacity.
Seal width deserves more attention than it usually gets. A 5 mm seal on a 100 g snack pouch is fine. The same seal width on a 2 kg powder pouch will fail a 1.2 m drop test with predictable regularity, because seal peel force scales with seal area while impact load scales with fill weight.
Why Brands Migrate from Rigid to Flexible Formats
The economics are mostly logistical. Flexible packaging pouches ship flat, so a truckload of empty pouches replaces several truckloads of empty jars or cans. Material mass per unit of product drops substantially, which lowers both material spend and freight weight.
Pallet density improves on the outbound side as well, since a filled pouch wastes less void volume than a cylindrical container. And the printable surface area relative to package weight is larger — you get a full-bleed billboard instead of a wrapped label.
The honest trade-offs: pouches have lower crush resistance, so secondary packaging and palletization patterns matter more. Multi-material laminates are harder to recycle than a single-polymer bottle. And artwork changes require a converter, which means lead time, not a label reprint you can run in-house.
Where Stand-Up Pouches Are the Wrong Choice
Formats fail when they’re forced. Skip the pouch when your product needs rigid stackability for warehouse or retail display, when fill weight exceeds roughly 5 kg without an engineered handle structure, or when the contents are carbonated — internal pressure and flexible seals don’t cooperate.
Some retail channels also mandate rigid formats for planogram consistency. Confirm with your channel partners before committing to tooling.

The Main Types of Stand-Up Pouches by Structural Design
Structural style determines capacity, shelf presence, and machine behavior. Here are the formats you will actually be quoting.
Doypack — The Standard Bottom-Gusset Stand-Up Pouch
The classic. A W-folded bottom gusset unfolds under fill weight into an elliptical base. Capacity ranges from about 30 ml sample sizes up to 5 L, with the sweet spot between 100 g and 1 kg.
Doypack packaging carries the lowest tooling cost of any stand-up format, which makes it the default for a new product launch or a market test. The trade-off is the rounded base — the pouch bulges at the bottom and tapers toward the top, reducing the flat, face-forward shelf area compared to squarer alternatives.
Fill-line note: doypacks run fastest on rotary premade pouch machines and tolerate a wider range of gripper settings than flat-bottom formats.
K-Seal / Corner-Seal Stand-Up Pouch
Angled seals across the bottom corners pull the gusset into a squarer footprint. The result is noticeably better standing stability, particularly for tall, narrow pouches where a doypack tends to lean.
The added seal area costs a small amount of film yield per pouch — typically a few percent — and the corner seals themselves consume artwork space. For 250–750 g formats with a height-to-width ratio above roughly 2:1, the stability gain is usually worth it.
Flat-Bottom Pouch (Box Pouch / Five-Panel Pouch)
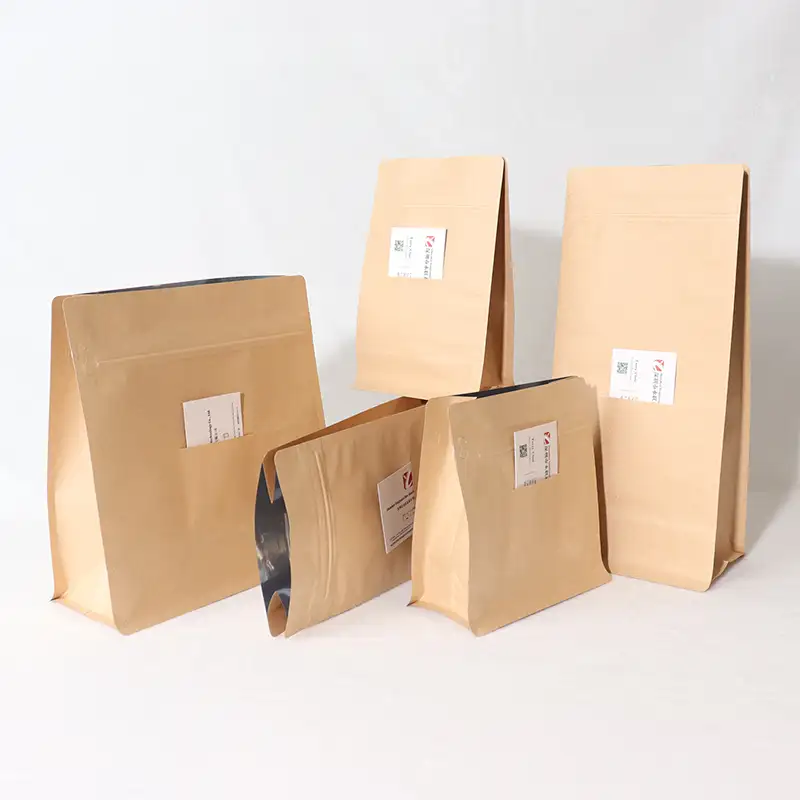
Five printable panels: front, back, two side gussets, and a true flat base. The pouch stands like a small carton and presents a genuinely rectangular face at shelf.
Coffee and premium pet food adopted this format aggressively because it block-stacks cleanly and reads as premium. The costs are real: tooling is more complex, machine speeds run slower than doypack equivalents, and the practical minimum size is larger — below roughly 100 g the format loses its structural advantage and looks squat.
Side-Gusseted Stand-Up Pouch
Expansion pleats on both sides allow larger fill volumes without an oversized flat dimension. This is the descendant of the traditional coffee bag, and it still dominates high-volume dry goods from 500 g to 5 kg.
Degassing valves mount naturally on the front panel or upper side gusset. For roasted coffee, valve placement should sit above the expected fill line to avoid fines clogging the valve membrane.
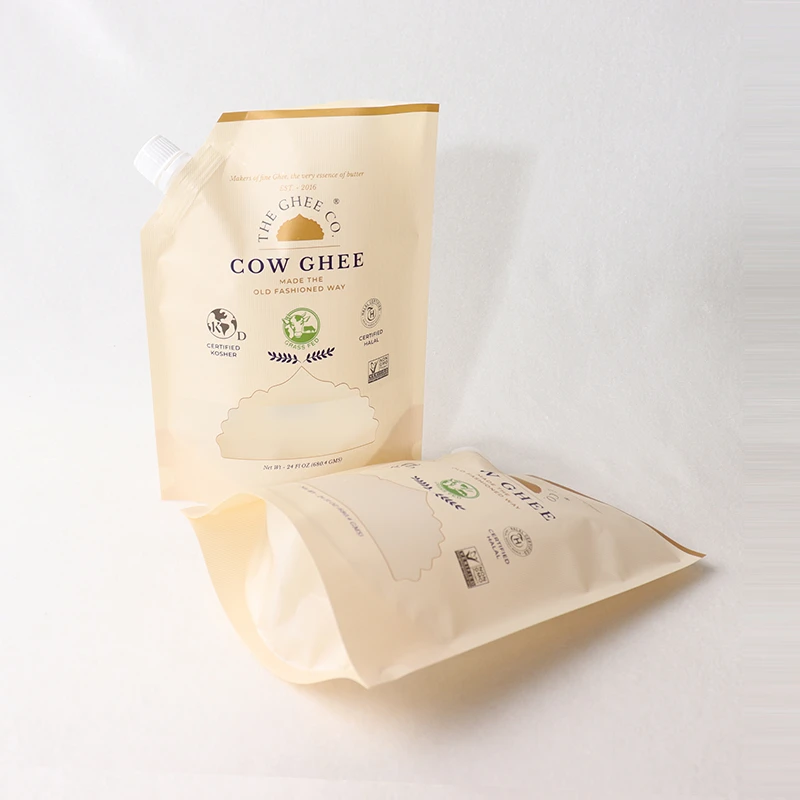
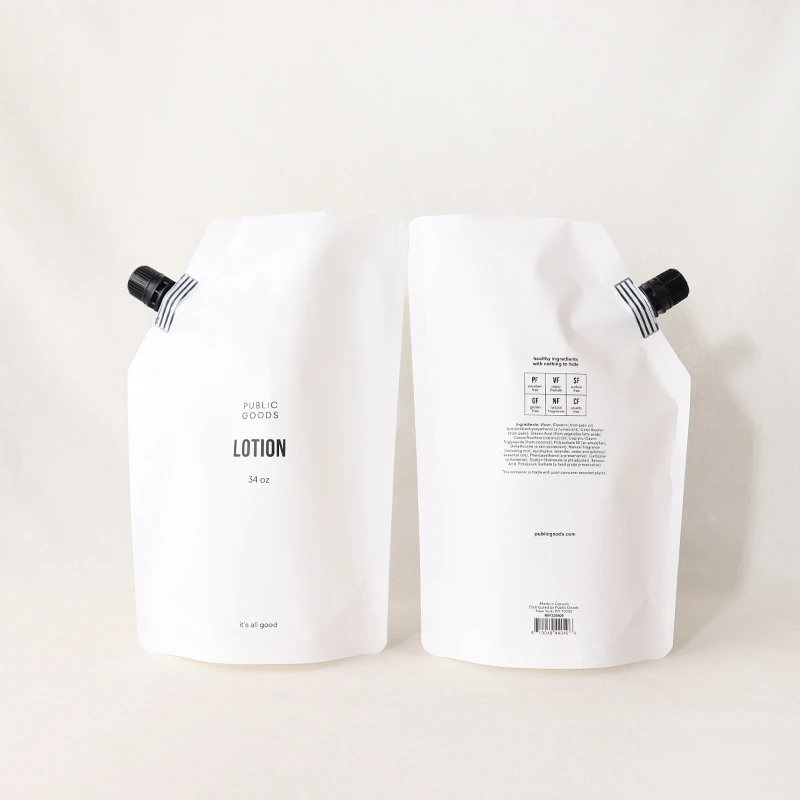
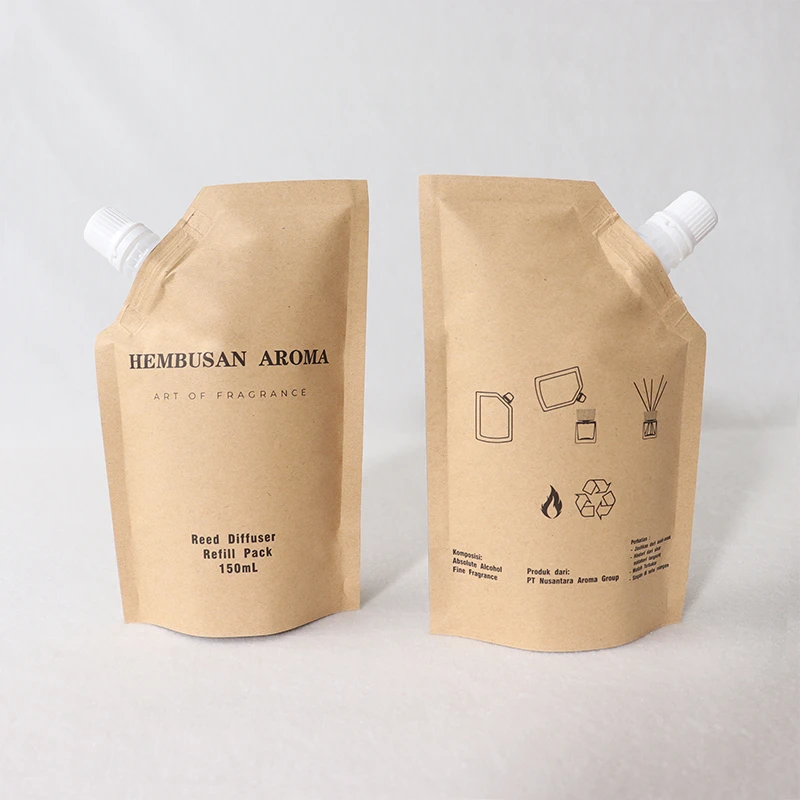
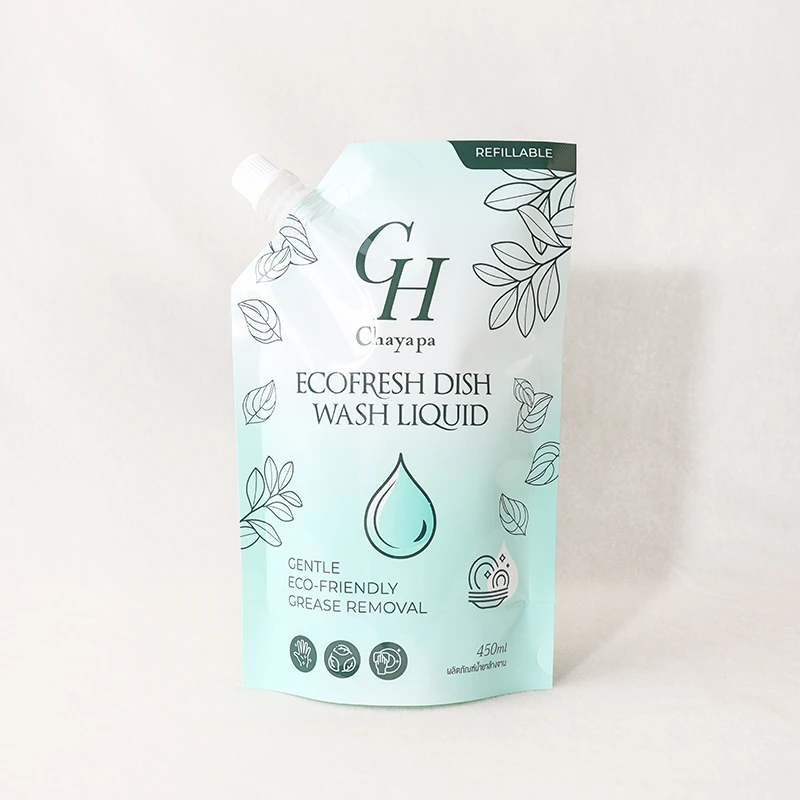
Spouted Pouch Packaging
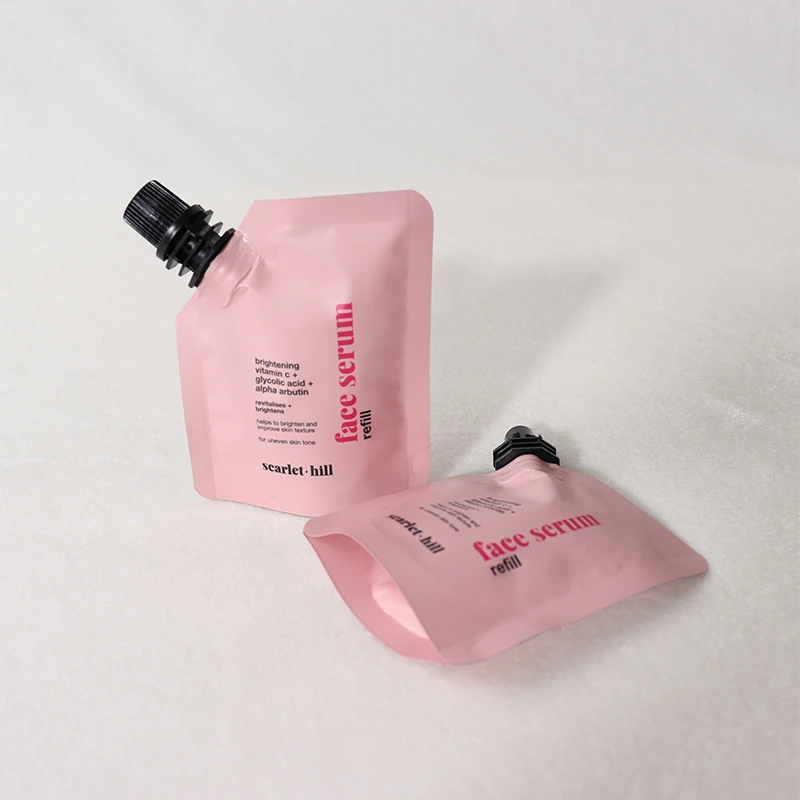
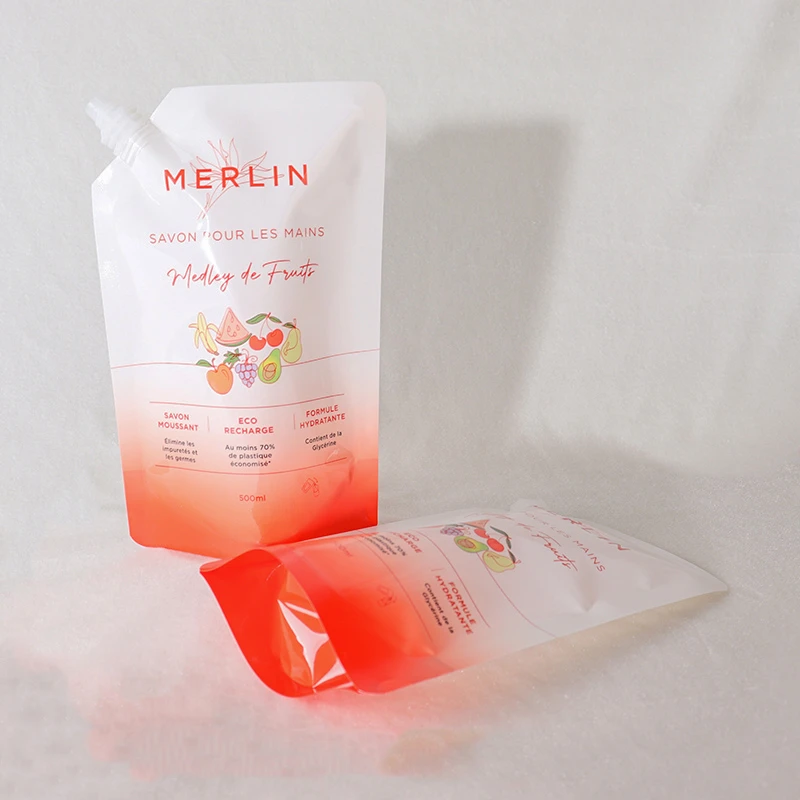
A fitment welded into the seal converts a pouch into a dispensing package. Spouted pouch packaging handles liquids, purees, gels, and anything pourable or squeezable.
Spout diameter conventions matter for compatibility. The 8.6 mm neck is the de facto standard for baby food and single-serve purees; 10–15 mm serves beverages and thin sauces; 20–42 mm necks handle viscous products, detergents, and refill packs. Cap options include standard screw, flip-top, sport cap, and child-resistant designs for regulated contents.
Placement is a real decision. Corner spouts pour cleanly and suit refill applications. Top-center spouts feel more like a bottle and suit hand-held drinking formats. Fitments can be pre-applied by the converter or inserted inline on your own equipment — confirm which method your filler supports before specifying, because the pouch construction differs.
Retort Pouch
A retort pouch is engineered to survive thermal sterilization, typically around 121 °C under counter-pressure for a validated dwell time. That process produces a shelf-stable product with no cold chain — which is often the entire business case.
The film structure is non-negotiable here. Retort laminates use CPP sealant webs rated for the temperature, adhesives qualified for retort conditions, and in most cases an aluminum foil barrier layer. Foil still dominates because it holds up mechanically under pressure and heat while delivering a near-absolute barrier. Transparent retort structures using specialized barrier films exist but carry shorter validated shelf life.
Any retort program requires process validation with your co-packer or thermal processing authority. Do not assume a pouch rated for retort is validated for your specific product, fill weight, and cycle.
Shaped and Contour-Cut Pouches
Die-cut silhouettes — a bottle profile, a rounded shoulder, a branded outline — create genuine shelf differentiation in crowded categories. The cost is a custom cutting die and a die-line approval cycle that adds time before first production.
Contour cutting also reduces material yield, since the offcut is waste. The return justifies the setup when you’re fighting for attention in a visually saturated category and running enough volume to amortize the tooling.

Specialty Variants Worth Knowing
- Window pouches — a transparent panel or die-cut window showing product. Requires a clear film zone in the laminate structure, which slightly compromises light barrier.
- Handle pouches — die-cut or applied handles for fills above roughly 2 kg. Needs local reinforcement to prevent tear propagation.
- Wicketed pouches — punched and stacked on wickets for automated pick-and-place lines. Common in bakery and frozen applications.
- Child-resistant pouches — specialized zipper or closure systems for regulated categories. Requires certification testing against the applicable protocol in your market.
Comparison Table: Pouch Types at a Glance
| Pouch Type | Typical Capacity | Best-Fit Categories | Standing Stability | Printable Panels | Tooling Complexity | Line Speed Impact |
|---|---|---|---|---|---|---|
| Doypack (bottom gusset) | 30 ml – 5 L | Snacks, powders, dried fruit, samples | Moderate | 2 | Low | Minimal |
| K-seal / corner seal | 100 g – 2 kg | Tall narrow formats, confectionery, tea | Good | 2 | Low–Moderate | Minimal |
| Flat-bottom / box pouch | 100 g – 5 kg | Coffee, pet food, premium grains | Excellent | 5 | High | Moderate slowdown |
| Side-gusseted | 250 g – 5 kg | Coffee, bulk dry goods, animal feed | Good | 4 | Moderate | Low |
| Spouted pouch | 50 ml – 5 L | Purees, beverages, sauces, detergents | Good | 2 | Moderate (fitment tooling) | Moderate slowdown |
| Retort pouch | 80 g – 3 kg | Ready meals, wet pet food, soups | Moderate | 2 | Moderate–High | Process-dependent |
| Shaped / contour-cut | 50 g – 1 kg | Cosmetics, premium snacks, promotions | Varies by shape | 2 | High (custom die) | Moderate |
| Wicketed | 100 g – 2 kg | Bakery, frozen, automated lines | Moderate | 2 | Moderate | Improves automation speed |
Film Structures and Barrier Materials: What Determines Shelf Life
Reframe the mental model here: the pouch shape is marketing, the laminate is engineering. A beautifully shaped pouch with the wrong film will fail your product.
How Multi-Layer Laminates Are Built
A barrier film laminate performs three jobs across three functional layers.
Outer web — carries the print and provides mechanical strength and abrasion resistance. Typically PET, BOPP, BOPA (for puncture resistance), or kraft paper for a matte natural look.
Middle barrier layer — blocks oxygen, moisture, light, or aroma migration. Options include aluminum foil, metallized PET, EVOH, aluminum oxide or silicon oxide coated films, and PVDC coatings.
Inner sealant web — bonds to itself under heat to form the seal, and is the only layer in direct product contact. LDPE, LLDPE, and CPP are standard; CPP is required for retort.
Layers are joined by adhesive lamination (a solvent-based or solventless adhesive cured between webs) or extrusion lamination (molten polymer laid between webs as both adhesive and layer). Adhesive lamination gives better optics and is more common for premium print; extrusion lamination is often more economical at high volume and adds bulk.
Common Laminate Structures and Their Applications
| Structure | Oxygen Barrier | Moisture Barrier | Light Barrier | Typical Shelf Life Range | Suited Products |
|---|---|---|---|---|---|
| PET / PE | Low | Moderate | None (clear) | 3–6 months | Candy, pasta, non-sensitive dry goods |
| PET / MET-PET / PE | High | High | High | 12–18 months | Coffee, snacks, powdered drinks |
| PET / AL / PE | Very high | Very high | Complete | 18–24+ months | Supplements, infant formula, spices |
| PET / EVOH / PE | High | Moderate | None (can be clear) | 9–18 months | Products needing visibility plus oxygen barrier |
| Kraft paper / PE (± MET) | Low–High (depends on layer) | Moderate | High | 6–12 months | Artisan coffee, tea, natural-positioned brands |
| PET / AL / CPP (retort) | Very high | Very high | Complete | 12–36 months shelf-stable | Ready meals, wet pet food, soups |
| Recyclable mono-material PE/PE | Low–Moderate (High with coating) | High | Optional (with MET-PE) | 6–12 months | Dry snacks, granola, pet treats |
Shelf life ranges above are typical industry planning figures, not guarantees. Actual performance depends on product water activity, fat content, fill atmosphere, and storage conditions — which is why accelerated shelf-life testing exists.
Reading OTR and WVTR Without a Materials Degree
OTR (oxygen transmission rate) measures how much oxygen passes through a given film area per day, usually expressed as cc/m²/24 h. Lower is better. A clear PET/PE structure might sit in the range of several cc/m²/24 h; a foil laminate approaches effectively zero.
WVTR (water vapor transmission rate) measures moisture passage, usually g/m²/24 h. Same principle — lower is better.
The critical detail buyers miss: both numbers are meaningless without test conditions. An OTR measured at 23 °C and 0% relative humidity will look far better than the same film measured at 38 °C and 90% RH. Always require the test conditions alongside the figure, and make sure the conditions reflect your actual distribution environment.
Practical targets: roasted coffee needs aggressive oxygen barrier plus a degassing valve. Salty snacks care more about moisture and light. Vitamin and mineral supplements often need near-zero oxygen and moisture, which pushes toward foil.
Film Thickness, Gauge, and Where Buyers Over-Specify
Total laminate thickness typically runs 80–120 microns for small consumer pouches, 120–160 microns for mid-size formats, and 160–220 microns for heavy or abrasive fills like pet food and mineral powders.
Heavier film is not automatically better. Beyond the point where puncture and seal strength requirements are met, added thickness buys stiffness you may not want, slows heat transfer through the seal (reducing line speed), increases material cost, and worsens the recyclability profile by adding mass to the waste stream.
The productive question is not “how thick?” but “what drop height, what puncture risk, what seal strength do we need?” Specify performance; let the converter propose the gauge.
Recyclable Mono-Material Film: Current Reality
A recyclable mono-material film replaces mixed-polymer laminates with structures made entirely from one polymer family — all-PE or all-PP — so the package can enter an existing polyolefin recycling stream rather than being rejected as a mixed laminate.
Where they work today: dry snacks, granola, pet treats, confectionery, and other products with short-to-medium shelf life and moderate barrier needs. Metallized PE and barrier-coated PE structures have closed much of the gap for moisture-sensitive dry goods.
Where they still fall short: very high oxygen barrier applications and anything requiring retort processing. The physics are unforgiving — because the outer and inner layers are the same polymer family, the sealing temperature window narrows considerably, and machine settings that worked on PET/PE structures will need requalification.
The other honest caveat is collection. In many markets, flexible mono-material packaging is recyclable through store drop-off programs rather than curbside collection. Claiming “recyclable” without qualifying the stream creates regulatory exposure in several jurisdictions. Ask your converter which recognized recyclability assessment protocol the structure has been evaluated against, and request the documentation.
Compostable and Bio-Based Options
Compostable structures typically combine PLA, cellulose-based films, and kraft paper with compostable sealant layers. They perform adequately for short shelf-life, low-barrier products — bakery, fresh produce, single-origin coffee sold within weeks.
Draw a hard line between industrially compostable (requires a commercial facility reaching elevated temperatures) and home compostable (breaks down in a backyard bin). These are distinct certification schemes with distinct testing. Ask which specific certification the material holds and in which market it is recognized, and confirm whether industrial composting infrastructure actually exists where your product is sold.
Also note: “bio-based” describes feedstock origin, not end-of-life behavior. A bio-based PE is chemically identical to fossil-derived PE and is not compostable.
Pros & Cons: Recyclable Mono-Material vs. Conventional High-Barrier Laminate
Continue from “ then tbody.>
| Recyclable Mono-Material (PE/PE, PP/PP) | Conventional High-Barrier Laminate (PET/AL/PE, PET/MET-PET/PE) |
|---|---|
| Pro: Enters existing polyolefin recycling streams where collection exists | Pro: Delivers the highest available oxygen, moisture, light, and aroma barrier |
| Pro: Supports credible recyclability messaging and eases extended producer responsibility exposure | Pro: Mature, well-characterized structures with decades of validated shelf-life data |
| Pro: Lower material mass in many structures, reducing freight weight | Pro: Wide sealing temperature window tolerates faster line speeds and less precise machine control |
| Con: Narrow sealing window; requires fill-line requalification and tighter temperature control | Con: Mixed-polymer construction is rejected by most mechanical recycling streams |
| Con: Oxygen barrier still trails foil and high-end metallized structures for the most sensitive products | Con: Growing regulatory and retailer pressure in several markets, including packaging fee structures |
| Con: Recyclability depends on store drop-off infrastructure that varies sharply by region | Con: Aluminum foil layers block product visibility entirely and add material mass |
| Con: Generally higher film cost per unit area at comparable barrier performance | Con: Over-specification is common — buyers pay for foil when metallized PET would have met the target |
The decision usually comes down to one question: does your product’s actual failure mode require barrier performance that mono-material cannot yet deliver? If your shelf life target is 9 months on a dry snack, the answer is probably no. If you’re packing a moisture-sensitive probiotic for 24 months, it’s probably yes.
Closures, Fitments, and Functional Add-Ons
Resealable Zipper Closure Types
A resealable zipper closure is the single most requested add-on, and the most commonly mis-specified.
- Press-to-close — the standard interlocking profile. Lowest cost, widest machine compatibility, runs at full line speed.
- Slider zipper — a plastic slider for one-handed opening. Strong consumer preference in family-size formats; adds cost and slows fill-line throughput because the slider assembly is bulkier in the seal zone.
- Pocket zipper — the zipper sits recessed below a tear-away header, keeping the closure clean until first opening. Common in coffee and pet food.
- Powder-resistant zipper — a profile designed to shed fines so the closure still seals after repeated openings. Essential for protein powders, flours, and spice blends, where a standard zipper clogs within a few uses.
- Child-resistant zipper — requires a deliberate two-step motion. Mandatory in some regulated categories; requires protocol testing and adds meaningful cost.
Mount position matters. The zipper sits below the tear notch so the consumer tears above the closure and leaves it intact. If the notch is placed below the zipper — it happens more often than you’d expect on first artwork rounds — the pouch becomes non-resealable on first open.
Line-speed reality: a press-to-close zipper on a rotary premade pouch machine typically costs little throughput. Sliders and child-resistant profiles can reduce output noticeably, because the machine must handle a thicker, less uniform seal zone.
Tear Notches, Laser Scoring, and Easy-Open Features
A single notch is the default — a small die-cut V or U at one side seal. Double notches on both sides let the consumer open from either direction and help left-handed users, at negligible added cost.
Laser scoring creates a controlled straight-tear line across the panel by ablating a partial depth of the outer web. It gives a clean, predictable opening rather than a ragged diagonal tear.
Behavior differs by structure. On PET-based laminates, laser scoring is well controlled and repeatable. On foil laminates, the foil layer influences tear propagation and scoring depth must be tuned carefully — too shallow and the tear wanders, too deep and you compromise the barrier. Always request scored samples for testing before committing to a full run.
Degassing Valves
Freshly roasted coffee releases carbon dioxide for days after roasting. Seal it in an unvented pouch and the package inflates until the seals fail. A one-way degassing valve lets CO₂ escape while blocking oxygen ingress.
This eliminates the traditional degassing delay — roasters can pack within hours of roast rather than holding beans in bins for one to three days, which improves both freshness at the consumer and warehouse turnaround.
Placement rules: mount the valve above the fill line on the front panel or upper gusset, keep it clear of the seal zone, and account for the valve footprint in the artwork die-line. Whole bean is more forgiving than ground coffee, where fines can migrate to the valve membrane.
Spouts and Fitments in Detail
Specify a spout by five attributes: neck diameter, thread standard, overall height, base geometry (the weld shape that bonds into the pouch seal), and cap type.
| Spout Size Range | Typical Application | Cap Options | Notes |
|---|---|---|---|
| 8.6 mm | Baby food, fruit purees, single-serve | Screw cap, choke-hazard-compliant designs | Industry-standard neck; widest filler compatibility |
| 10–15 mm | Beverages, thin sauces, liquid supplements | Screw, flip-top, sport cap | Good balance of pour rate and closure security |
| 16–22 mm | Thick sauces, condiments, gels, cosmetics | Flip-top, screw with liner | Needed once viscosity slows flow through narrow necks |
| 28–42 mm | Detergents, refill packs, bulk liquids | Screw, tamper-evident, child-resistant | Larger weld footprint; check seal integrity at fill weight |
Tamper-evident rings, induction-seal liners, and cap application torque all need to match your capping head. Mismatched torque is a frequent cause of leakers — over-torque cracks the neck, under-torque leaves an inconsistent seal. Run a torque study during your pre-production trial.
Windows, Handles, Hang Holes, and Anti-Slip Coatings
Windows require a clear zone in the laminate and a registered die-cut or unprinted area; specify the exact window dimensions and position relative to the fill line so the consumer sees product, not headspace.
Handles — die-cut holes or applied plastic handles — need reinforcement to stop tear propagation under load. Hang holes and euro slots are inexpensive but require adequate top seal depth above the punch, typically 15–20 mm.
Anti-slip coatings on the outer web improve pallet stability for stacked pouches and reduce slippage on conveyors. Worth asking about if you’ve had load-shift problems in transit.
Feature Selection by Product Category
| Product Category | Recommended Pouch Type | Recommended Closure | Barrier Priority | Compliance Note |
|---|---|---|---|---|
| Roasted coffee | Flat-bottom or side-gusseted | Pocket zipper + degassing valve | Oxygen, aroma, light | Food-contact declaration; valve material compliance |
| Snacks & chips | Doypack or K-seal | Press-to-close zipper | Moisture, light, oxygen | Allergen labeling space on die-line |
| Pet food & treats | Flat-bottom or side-gusseted with handle | Slider or press-to-close | Fat migration, moisture, puncture | Feed regulations vary by market |
| Powdered supplements | Doypack or flat-bottom | Powder-resistant zipper | Moisture, oxygen (often foil) | Supplement labeling; batch traceability |
| Sauces & purees | Spouted pouch | Screw or flip-top cap, tamper-evident | Oxygen, hot-fill or retort resistance | Thermal process validation |
| Liquid detergents | Spouted refill pouch | Large-diameter screw cap | Chemical resistance, puncture | Hazard labeling; chemical compatibility testing |
| Ready meals | Retort pouch | Sealed, optional steam vent | Complete barrier + thermal resistance | Retort validation; food-contact at high temperature |
| Cosmetics & personal care | Shaped or spouted pouch | Flip-top or fine-tip spout | Oxygen, light, formulation compatibility | Cosmetic regulations; ingredient listing space |
| Dried herbs & spices | Doypack, foil structure | Press-to-close zipper | Aroma retention, light, moisture | Food-contact declaration; origin labeling |
Printing Methods and Color Management
Rotogravure Printing
Gravure engraves the image into a chrome-plated copper cylinder — one cylinder per color. Ink fills the engraved cells, a doctor blade wipes the surface, and the cells transfer ink to the web.
The image quality ceiling is the highest of the three processes: dense solids, smooth gradients, and exceptional consistency across long runs. The catch is tooling. Each cylinder represents a real investment, and an eight-color design means eight cylinders before you print a single pouch.
Gravure becomes the economical choice once annual volume is high enough to amortize cylinders across multiple runs. The cylinders are stored and reused, so reorders print with near-identical color — a genuine advantage for established brands with locked-down artwork.
Flexographic Printing
Flexo uses flexible photopolymer plates mounted on cylinders, with an anilox roll metering ink. Plate costs are a fraction of gravure cylinders, which lowers the entry point substantially.
Modern high-definition flexo plates have narrowed the quality gap considerably. On solids, screens, and fine text, well-executed HD flexo now rivals gravure for most consumer packaging applications. The mid-volume range is its natural home — runs too large for digital economics but not yet justifying cylinder tooling.
Digital Printing
No plates, no cylinders. Artwork goes from file to press, which collapses setup time and makes short runs and rapid iteration viable.
Digital is the right answer for market tests, seasonal variants, regional SKUs, limited editions, and any situation where you’re running many designs at low quantity each. Variable data — sequential codes, personalization, versioned artwork within one run — is straightforward.
The honest limitations: substrate range is narrower than conventional processes, ink adhesion needs verification on each film structure (request adhesion and rub testing), and metallic effects or precise spot color matches are harder to reproduce than with dedicated spot inks. Per-unit cost also stops improving beyond a certain run length, which is where flexo takes over.
Printing Method Decision Table
| Method | Practical Run Length | Setup Complexity | Color Consistency | Artwork Change Flexibility | Best-Fit Scenario |
|---|---|---|---|---|---|
| Digital | Small to moderate runs | Very low — no tooling | Good; verify across batches | Excellent — change any time | Launches, market tests, many SKUs, variable data |
| Flexography | Moderate to large runs | Moderate — plates per color | Very good with HD plates | Moderate — new plates per change | Established SKUs at mid volume; growing brands |
| Rotogravure | Large to very large runs | High — cylinder engraving | Excellent, highly repeatable | Low — re-engraving required | High-volume, stable artwork, premium image quality |
Surface Printing vs. Reverse (Trap) Printing
Reverse printing places the ink on the inside surface of the outer web, so the laminate itself covers the image. The ink is trapped between layers — protected from abrasion, scuffing, moisture, and contact with the product. This is standard practice for food-contact pouches and is why premium pouches keep their gloss through distribution.
Surface printing puts ink on the outside, protected only by an overprint varnish. It’s acceptable for kraft paper structures where the matte natural look is the point, and for non-abrasive applications. For anything that will be handled repeatedly or shipped in bulk, reverse printing is the safer specification.
Color Management and the Approval Workflow
Set expectations in the specification, not after the press run. A Delta E tolerance of roughly 2 or below is a common commercial target for critical brand colors; asking for absolute zero variation is not realistic across substrates and processes.
Decide early whether brand colors are spot inks or process builds. Spot inks give consistency and match brand standards precisely but add a print station and cost. Process builds are cheaper but shift more between runs and substrates.
A digital proof tells you layout and content. It does not tell you color on your actual film. A printed proof on the specified substrate, laminated with the specified finish, is the only reliable approval. The same artwork looks visibly different under matte lamination versus gloss — matte mutes saturation and darkens, gloss deepens contrast.
Once you approve, keep a physical retained sample as the master color standard and reference it on every reorder. This is the single most effective practice for preventing gradual color drift across years of production.
Finishing Effects
Gloss lamination maximizes color saturation and is the default for food categories. Matte lamination reads premium and photographs well but shows fingerprints and scuffing more readily. Soft-touch coating adds a tactile velvet feel that consistently tests well in premium categories.
Spot UV creates localized high-gloss on a matte field — effective on logos and product imagery. Cold foil adds metallic brilliance with better print registration than hot stamping. Registered matte/gloss combinations create texture contrast within a single lamination pass.
Candid assessment: soft-touch and registered matte/gloss deliver the most consumer-noticeable impact per unit of added cost. Heavy use of spot UV across large areas often adds cost without proportional shelf return. Pick one or two effects and execute them well rather than layering everything.
Compliance, Testing, and Documentation
Food-Contact Regulatory Frameworks by Market
Requirements differ by region, and your converter should supply market-specific documentation rather than a generic statement.
In the United States, food-contact materials fall under federal food-contact substance requirements, with materials either cleared under specific regulations or covered by notification. Ask for a letter of food-contact compliance identifying the applicable clearances for each layer.
In the European Union, the framework regulation on food-contact materials and the specific plastics regulation govern composition and migration limits. The expected document is a Declaration of Compliance covering overall and specific migration, accompanied by supporting migration test reports run under conditions matching your product type and storage temperature.
Other major markets — including regimes in East Asia, the Gulf, and Latin America — operate comparable systems with their own positive lists and testing requirements. If you export, specify every destination market in your sourcing brief so the converter selects globally compliant materials from the start rather than reformulating later.
The practical rule: request documentation by name. “Declaration of Compliance,” “migration test report,” “food-contact statement,” “material safety data for adhesives and inks.” A supplier who can produce these quickly has done this before.
Pharmaceutical and Nutraceutical Considerations
Documentation burden rises sharply in regulated health categories. Expect to discuss extractables and leachables — what can migrate from the packaging into the product under exaggerated and real conditions — and to require supporting study data or a justification for why studies are not applicable.
Batch traceability from raw film roll through finished pouch becomes a hard requirement, not a nice-to-have. Ask how lot codes are recorded and how long records are retained.
Production environment expectations also change: controlled-environment or clean-room lamination and converting areas, defined pest control, restricted access, and documented sanitation schedules. Verify these during supplier qualification, ideally with an audit or at minimum a documented virtual walkthrough.
Standard Performance Tests Buyers Should Request
| Test | What It Measures | Why It Matters to You |
|---|---|---|
| Seal strength (peel test) | Force required to separate a sealed area | Predicts leakers and seal failures in distribution |
| Drop test | Survival after free fall from a defined height, filled | Validates real-world handling; exposes weak gusset seals |
| Burst / pressure test | Internal pressure at which the pouch fails | Critical for air freight, altitude changes, and gas-flushed packs |
| OTR (oxygen transmission) | Oxygen passing through the film per area per day | Directly drives shelf life for oxidation-sensitive products |
| WVTR (water vapor transmission) | Moisture passing through the film per area per day | Determines caking, sogginess, and texture loss |
| Rub / scuff resistance | Print durability under abrasion | Prevents artwork degradation during shipping and shelf handling |
| Accelerated shelf-life study | Product quality over time at elevated temperature/humidity | The only credible basis for a printed expiry date |
Certifications and Audit Standards Worth Asking About
Frame supplier qualification as a list of questions, not a checkbox exercise:
- Which food safety management certification does the facility hold, and when was the last audit? Internationally recognized food safety schemes are the baseline for food-contact converting.
- Is there a quality management system certification covering the production process, with documented corrective-action procedures?
- For sustainability claims — is recycled content verified through a chain-of-custody scheme, and has recyclability been assessed against a recognized protocol?
- What social compliance or ethical audit standards has the facility been assessed against?
- Can you see the certificates themselves, with current validity dates and scope covering your product type?
Scope matters as much as the certificate. A certification covering one production line does not automatically cover the line running your job.
Labeling Requirements That Affect Die-Line Layout
Regulatory content competes with brand design for panel space, and it wins. Reserve space early for nutrition or ingredient panels, allergen statements, net weight declarations, country of origin, recycling marks, and responsible-party contact details.
Barcodes need adequate quiet zones on both sides and should not cross a gusset fold or sit in a seal area, where distortion prevents reliable scanning.
One detail most first-time buyers miss: reserve a clean area for inline coding. Batch codes and expiry dates are typically applied by inkjet or laser on your fill line, and those systems need a print-free, low-texture zone to produce a legible code. A glossy varnish or a busy graphic in the coding window causes smearing and unreadable dates.
Specifying and Sourcing Custom Stand-Up Pouches: A Practical Workflow
This is the sequence that keeps a project from looping back on itself. Each step feeds the next, and skipping one almost always costs more than doing it.
Step 1 — Define the Product and Its Failure Mode
Ask one question first: what actually ruins this product? Oxygen (rancidity in nuts and fats), moisture (caking in powders, softening in crackers), light (vitamin and pigment degradation), aroma loss (coffee, tea, spices), or fat migration through the sealant layer.
The answer drives the entire film decision. A high-fat granola and a sugar-based candy of identical weight need completely different laminates. Write the failure mode down at the top of your specification sheet — it’s the reference point for every later trade-off.
Step 2 — Fix Fill Volume, Fill Weight, and Bulk Density
A 500 g coffee pouch and a 500 g protein powder pouch are different packages. Whole bean coffee has a bulk density around 0.35–0.40 g/ml; a dense protein blend may sit near 0.55–0.70 g/ml. The coffee pouch needs substantially more internal volume for the same weight.
A workable estimation method:
- Divide fill weight (g) by bulk density (g/ml) to get product volume in ml.
- Add 15–25% headspace — more for products that need settling room or gas flushing.
- Give the converter that total volume plus your preferred shelf proportions (tall and narrow, or wide and squat), and let them propose flat dimensions and gusset depth.
Measure your own bulk density rather than using a reference figure. Grind size, moisture content, and processing all shift it, and a 10% error at this stage produces a pouch that looks half-empty on shelf.
Step 3 — Confirm Fill-Line Compatibility
Decide between premade pouches and rollstock before anything else in this step.
Premade pouches arrive finished and are loaded onto a rotary pouch machine that opens, fills, and seals. Lower equipment investment, greater format flexibility, more forgiving for complex structures like flat-bottom and spouted pouches.
Rollstock feeds a vertical or horizontal form-fill-seal machine that forms the pouch inline. Higher throughput and lower material cost per unit at volume, but the machine constrains what shapes you can run.
Then confirm the details that break runs: your sealing jaw temperature window, dwell time, whether the line applies zipper-first or zipper-last, gripper spacing, and maximum pouch dimensions. Send these specs to your converter with the initial brief, not after the first sample fails.
Step 4 — Choose Pouch Type and Closure
Cross-reference the structural comparison table against your capacity, shelf-presence goal, and machine constraints. Then select the closure using the category table — confirming the zipper or fitment is compatible with the machine you identified in Step 3.
Step 5 — Lock the Film Structure and Print Method
Match target shelf life to laminate, and annual volume to print process. If you’re launching with uncertain demand, digital printing on a stock-compatible film structure lets you validate the market before committing to plates or cylinders.
Ask your converter to propose two structures — the one that meets your target and one a step down — with the shelf-life difference quantified. That comparison usually reveals whether you’re over-specifying.
Step 6 — Build the Die-Line and Artwork Package
Request the converter’s die-line template before your designer starts. Working from a generic template creates rework.
- File format: vector artwork (AI, PDF with editable layers, or EPS), all fonts outlined or supplied.
- Bleed: typically 3–5 mm beyond the trim line on all edges.
- Safe zone: keep critical text and logos 5–8 mm inside the trim.
- Seal exclusion: no essential content in the top seal zone or within the side seal width.
- Color: spot colors named explicitly; process elements in CMYK, not RGB.
- Layers: die-line, print artwork, varnish/spot UV, and white ink each on separate named layers.
Gusset distortion deserves special attention on flat-bottom pouches. The bottom panel prints flat but folds into five surfaces, and artwork crossing a fold line will appear broken or misaligned on the finished pouch. Design bottom panels as self-contained compositions and keep logos away from fold lines entirely.
Step 7 — Approve Proofs and Run Pre-Production Samples
The approval sequence in order: digital proof for layout and content → printed proof on the specified substrate for color → finished sample pouch for construction and feel → fill-line trial with actual product.
The fill-line trial is the step buyers skip when a launch date is tight, and it’s the most expensive shortcut available. A trial catches seal temperature mismatches, zipper misregistration, gripper slippage, and spout torque problems while you’re testing a few hundred pouches — not after 100,000 have been produced and shipped.
Step 8 — Set Order Quantity, Lead Time, and Reorder Cadence
Minimum order quantities are driven by print method and film structure. Digital printing supports far smaller commitments because there’s no tooling to amortize. Flexography requires enough volume to justify plates. Rotogravure carries the highest minimum because cylinder engraving must be spread across production. Specialty films and custom fitments raise the floor further.
Lead times break into distinct stages. Artwork and proof approval is usually the most variable — it depends on how quickly your team responds. Tooling (cylinder engraving, plate making, custom dies) adds a fixed block for new designs but disappears on reorders. Production scheduling, lamination curing, and converting follow. Then transit, where ocean freight and air freight differ by weeks.
The smart structure for established SKUs is a blanket order with scheduled releases: commit to an annual volume to secure pricing and production slots, then take delivery in scheduled batches. You get volume terms without tying up cash in inventory or filling a warehouse with a year of pouches.
Specification Sheet Checklist
| Field | What to Provide |
|---|---|
| Pouch type | Doypack, K-seal, flat-bottom, side-gusseted, spouted, retort, or shaped |
| Flat dimensions | Width × height in mm, excluding gusset |
| Gusset depth | Bottom and/or side gusset in mm |
| Fill volume | Product volume in ml, plus intended headspace percentage |
| Fill weight | Net weight and measured bulk density |
| Film structure | Layer-by-layer specification, or state the performance target and let the converter propose |
| Total thickness | Target micron range, or performance requirement (drop height, puncture) |
| Barrier target | OTR and WVTR values with test conditions stated |
| Closure | Zipper type and exact position below the tear notch |
| Notch style | Single, double, or laser-scored straight tear |
| Spout specification | Neck diameter, thread standard, height, cap type, position |
| Additional features | Degassing valve, window, handle, hang hole, steam vent |
| Print method | Digital, flexographic, or rotogravure |
| Number of colors | Process colors plus named spot colors |
| Finish | Gloss, matte, soft-touch, spot UV, cold foil |
| Print orientation | Reverse (trap) or surface printed |
| Compliance requirement | Destination markets and required documentation |
| Order quantity | Initial order and projected annual volume |
| Delivery date | Required arrival date and destination port or facility |
| Fill-line details | Machine make/model, sealing temperature range, premade or rollstock |
Send this filled out with your first inquiry and you’ll get an accurate quote in one round instead of five.
Cost Drivers: Understanding What Moves Your Quote
Custom pouches don’t have list prices, because no two specifications are alike. What you can understand is which variables move the number most — and where you have room to optimize.
The Variables That Shift a Quote the Most
Order quantity ranks first, consistently. Setup, tooling, and press make-ready are fixed costs spread across the run; doubling quantity does not double the total.
Film structure complexity comes second. Each additional layer adds material, a lamination pass, and curing time. Foil-containing structures sit well above metallized equivalents.
Number of print colors is third. Each color means another plate or cylinder and another press station, affecting both tooling and run speed.
Pouch dimensions and material yield matter more than buyers expect. A pouch width that nests efficiently across the film web wastes far less material than one that leaves a wide unused strip. Ask your converter whether a small dimensional adjustment improves web utilization.
Closures and fitments add component cost plus application time. Finishing effects add passes. Tooling amortization is heaviest on the first order and effectively disappears on reorders of the same artwork.
Relative Cost Impact Table
| Variable | Relative Impact | Optimization Notes |
|---|---|---|
| Order quantity | High | Blanket orders with scheduled releases capture volume terms without inventory burden |
| Film structure | High | Validate whether metallized PET meets your shelf life before specifying foil |
| Print colors | Moderate–High | Design with fewer spot colors; use the film’s own finish as a design element |
| Pouch dimensions | Moderate | Minor width adjustments can significantly improve web yield |
| Closures and fitments | Moderate | Standard press-to-close zippers cost far less than sliders or child-resistant profiles |
| Finishing effects | Low–Moderate | Choose one signature effect rather than layering several |
| Tooling | High on first order, negligible on reorder | Digital printing eliminates it entirely for launches and test runs |
| Shipping mode | Moderate | Planning ahead lets you use ocean freight instead of air |
Where Buyers Reduce Cost Without Reducing Quality
- Consolidate SKUs onto a shared film structure. If five products can run on one laminate, you buy film in larger lots and simplify inventory.
- Standardize pouch sizes across product lines. Shared dimensions mean shared tooling and shared machine setups.
- Right-size the film gauge. Specify drop-test and puncture requirements, then let the converter propose the minimum structure that passes.
- Reduce color count through design. A strong two-color design on a metallized substrate often outperforms a busy seven-color layout at shelf.
- Commit volume across a release schedule. Annual commitment with staged delivery is the most reliable lever available to most buyers.
Total Cost Beyond the Pouch
Unit cost comparisons against rigid packaging often reverse once you account for the rest of the chain. Shipping cube drops substantially when empty packaging ships flat. Warehouse footprint for incoming packaging shrinks accordingly.
Filled goods ship denser on the pallet, reducing freight per unit of product sold. Damage rates frequently improve, since flexible packaging absorbs impact rather than shattering. And on the fill line, throughput differences between formats compound across a production year.
Build a landed cost model that includes packaging material, inbound freight, warehousing, fill-line labor and throughput, outbound freight, and damage/return rates. That’s the comparison that matters.
Common Sourcing Mistakes and How to Avoid Them
Specifying a Pouch Before Confirming Machine Compatibility
The most frequent expensive error. Symptoms are unmistakable: incomplete seals, product trapped in the seal zone, pouches jamming in the gripper chain, zippers landing off-center after sealing.
The fix is simple and takes one email — send your machine make, model, sealing temperature range, jaw dwell time, and maximum pouch dimensions with your initial inquiry.
Over-Engineering the Barrier for the Actual Shelf Life
Buyers routinely pay for aluminum foil when a metallized PET structure would have comfortably delivered the required shelf life. The cost premium is real, and so is the sustainability penalty — foil laminates are effectively unrecyclable in mechanical streams.
Run an accelerated shelf-life study on two structures before committing. The data usually justifies the step down.
Ignoring Gusset Artwork Distortion
A logo centered on a flat design that happens to sit across the bottom gusset fold will be cut in half and folded out of view on the finished pouch. Always review artwork on a folded physical mock-up, not a flat proof.
Approving Color From a Screen
Monitors emit light; printed film reflects it. They never match. Add lamination on top — matte versus gloss shifts perceived saturation noticeably — and screen approval becomes guesswork.
Insist on a printed proof on your actual substrate with your actual finish. Then retain it as the master standard.
Treating Sustainability Claims as Interchangeable
Recyclable, recycled content, compostable, and biodegradable are four distinct claims with four distinct evidentiary requirements and four distinct legal exposures. Regulators in multiple markets have tightened enforcement on unsubstantiated environmental marketing.
Use only the claim your documentation supports, qualify it (store drop-off versus curbside; industrial versus home composting), and keep the supporting certificates on file.
Underestimating Lead Time for New Tooling
Cylinder engraving, plate production, custom die fabrication, and first-article approval each consume calendar time that buyers forget when they back-plan from a launch date. Then shipping adds weeks on top.
Build the timeline forward from artwork kickoff rather than backward from the launch, and add buffer for one proof revision cycle — because there’s almost always one.
Best Practices Checklist
- Send machine specifications with your first inquiry, before any pouch design work begins.
- Define the product’s failure mode in writing and let it drive the film decision.
- Request two film options with quantified shelf-life differences instead of accepting the first proposal.
- Review all artwork on a folded physical mock-up, never on a flat proof alone.
- Approve color only from a printed proof on the specified substrate with the specified finish.
- Run a fill-line trial with real product before releasing full production.
- Retain a master sample and reference it on every reorder.
- Keep compliance and certification documentation on file for every material and destination market.
- Plan the timeline forward from artwork kickoff, with buffer for a revision cycle.
Frequently Asked Questions
What is the difference between a doypack and a flat-bottom pouch?
A doypack uses a W-folded bottom gusset that expands into a rounded, elliptical base and offers two printable panels. A flat-bottom pouch has a true rectangular base plus two side gussets, giving five printable panels and a squared, carton-like profile. The flat-bottom stands more stably and presents better at shelf; the doypack costs less in tooling and typically runs faster on the fill line.
Which stand-up pouch type is best for liquids?
Spouted pouches are the standard choice for anything pourable. Match spout diameter to viscosity: around 8.6 mm for thin purees and baby food, 10–15 mm for beverages and light sauces, 16–22 mm for thick condiments and gels, and 28 mm or larger for detergents and refill packs. Highly viscous products need both a wider neck and a pouch shape that allows the contents to be squeezed toward the fitment.
Can stand-up pouches be recycled?
It depends entirely on the film structure. Mono-material all-PE and all-PP pouches are designed for polyolefin recycling streams and are accepted through store drop-off programs in many regions, though curbside acceptance remains limited. Multi-material laminates containing aluminum foil, PET, and PE bonded together cannot be separated in standard mechanical recycling and are generally not recyclable. If recyclability matters to your brand, specify mono-material at the design stage and request the recyclability assessment documentation.
What shelf life can a stand-up pouch deliver?
Roughly 3–6 months for a basic clear PET/PE structure, 12–18 months for metallized structures, and 18–24 months or more for foil laminates. Retort pouches can achieve multi-year shelf stability. These are planning ranges, not guarantees — actual shelf life depends on your product’s water activity, fat content, fill atmosphere, and storage conditions. Validate with an accelerated shelf-life study before printing an expiry date.
Are stand-up pouches microwave safe?
Some are, by design. Microwaveable structures use heat-resistant sealant layers and typically incorporate a steam-venting feature — a self-venting seal or laser-scored vent — that releases pressure safely. Aluminum foil layers must be avoided entirely in any microwaveable format. Never assume a standard pouch is microwave-safe; specify the requirement upfront so the correct film and vent design are engineered in.
What is the minimum order quantity for custom stand-up pouches?
Minimums vary by print method and film structure rather than by a single universal number. Digital printing carries the lowest minimum because there is no tooling to amortize, making it practical for launches and market tests. Flexography requires more volume to justify plate costs, and rotogravure requires the most because of cylinder engraving. Specialty films, custom fitments, and unusual dimensions raise the floor further. Share your realistic volume and a supplier can propose the process that fits.
How long does a custom pouch order take from artwork to delivery?
Break it into four stages. Artwork finalization and proof approval is the most variable and depends largely on your internal review speed. Tooling — cylinder engraving, plate making, or custom die fabrication — applies only to new designs and disappears on reorders. Production includes printing, lamination, curing, and converting. Transit depends on shipping mode, with ocean freight adding several weeks over air. Digital short runs compress the first two stages dramatically; gravure jobs with new cylinders extend them.
Can existing filling equipment handle stand-up pouches?
Often, but verify before ordering. Rotary premade pouch machines handle most stand-up formats with format-part changes. Vertical form-fill-seal lines run rollstock and are constrained to the shapes the forming collar produces — adding a bottom gusset or spout usually is not possible without significant modification. If you’re moving from rigid to flexible, the question is whether to retrofit or invest in a dedicated pouch machine, and the answer depends on your volume and the number of formats you plan to run.
What file formats and artwork specifications do suppliers need?
Vector files — AI, layered PDF, or EPS — with all fonts converted to outlines or supplied separately. Spot colors must be named explicitly rather than left as unnamed swatches, and process elements should be in CMYK, not RGB. Keep the die-line, print artwork, varnish or spot UV, and any white ink on separate named layers. Always start from the converter’s own die-line template, and include 3–5 mm bleed with a 5–8 mm safe zone.
How should pouches be stored before filling?
Store unfilled pouches in a cool, dry, temperature-stable environment — moderate room temperature with relative humidity kept in a controlled range. Avoid direct sunlight, which degrades printed inks, and avoid temperature swings that cause condensation inside the cartons. Observe stacking limits on the packaging cartons; crushed cartons deform pouch gussets and cause feeding problems on the fill line. Unfilled pouches with zippers and adhesive-laminated structures do have a practical usable life, typically measured in months to a couple of years depending on structure, so rotate stock first-in, first-out rather than letting a reserve sit for years.
Matching the Right Pouch to Your Next Production Run
The decisions in this guide only work in sequence. Product failure mode determines the film structure. The film structure narrows the viable pouch types. The pouch type and your fill line together determine the closure. Annual volume selects the print method. Volume and tooling set the order quantity and lead time.
Reverse that order — picking a pouch shape first because a competitor uses it, then forcing a film to fit — and you end up requalifying the line or reprinting inventory. Neither is cheap.
Treat this as a repeatable process rather than a one-time choice. Each new product runs through the same six questions, and by the third or fourth SKU your team will be writing specification sheets that converters can quote from immediately.
Your Next Step
Send us the details that actually matter: what your product is, what spoils it, target shelf life, fill weight and bulk density, annual volume expectation, and the make and model of your filling equipment. From that we’ll return a structural recommendation, a layer-by-layer material specification, and a physical sample set you can put through your own line.
YLTPACK has been engineering custom stand-up pouches and flexible packaging to customer specification since 2005. Production operates under ISO 22000 food safety management certification, with FDA-compliant food-contact materials and full documentation — declarations of compliance, migration test reports, and material specifications — supplied with every order.
Free samples are available before you commit to a production run, because a pouch that looks right on a proof still has to survive your fill line. We’d rather you test it first.
Reach the sourcing team at info@yltpack.com with your specification sheet — or with just the product and the problem, if you’re still working out the specification. Either way, you’ll get a technical answer rather than a catalog.
One last practical note: the fastest projects we run are the ones where the buyer sends machine specs, target shelf life, and realistic annual volume in the first message. That single email typically removes a full week of back-and-forth from the timeline.